Blog / Brackeys Game Jam 2022.2 Lessons Learned
I participated in Brackeys Game Jam 2022.2 on a team with Ding, Hobba, and The Doc. The game jam lasted one week. Our entry was Unknown Corridor, a small adventure game where you have to get through a series of rooms in a dark factory by solving puzzles.
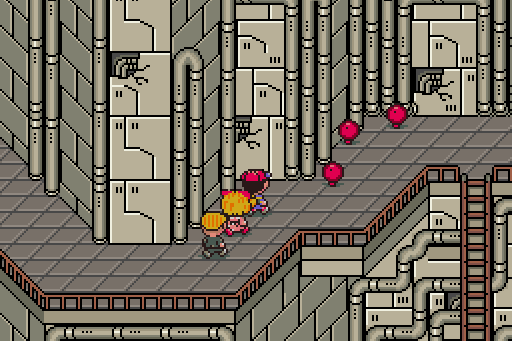
My role was building the environments for each level. The art style was sort of a mashup between Minecraft and the Paper Mario series— blocky 3D environments with pixel-perfect textures, and objects represented by 2D sprites. I'm not really a pixel artist, so don't take my advice as professional-grade, but if you need to put together some quick and dirty graphics for something of this nature, maybe what worked for me will work for you.
This was my first time using the game engine Unity and, ideological qualms about the proprietary license aside, the user experience itself didn't win me over. It was definitely faster to get a 3D game up and running than starting from scratch would ever be, but at the same time Unity is such a massive engine that using it for a game jam feels like overkill. I worked mostly with the scene editor, which I found clunky and unintuitive. This experience was on Debian Linux with an Intel i7-3770 and 16 GB of RAM.
Download Links
Workflow
My workflow went this way:
- Before doing anything with Unity, everyone on the team came up with an idea for a level, and then Ding sketched out an order for the levels on a whiteboard.
- Once that was done, I made a list of the necessary tiles (floors, walls, door, pipes, crates, switches, and so on).
-
Then, my process for creating the levels was:
- Create a tileset in GIMP
- In Tiled, use the tileset to draw textures
- Import textures into the Unity Editor and apply them to cubes and quads in the scene editor
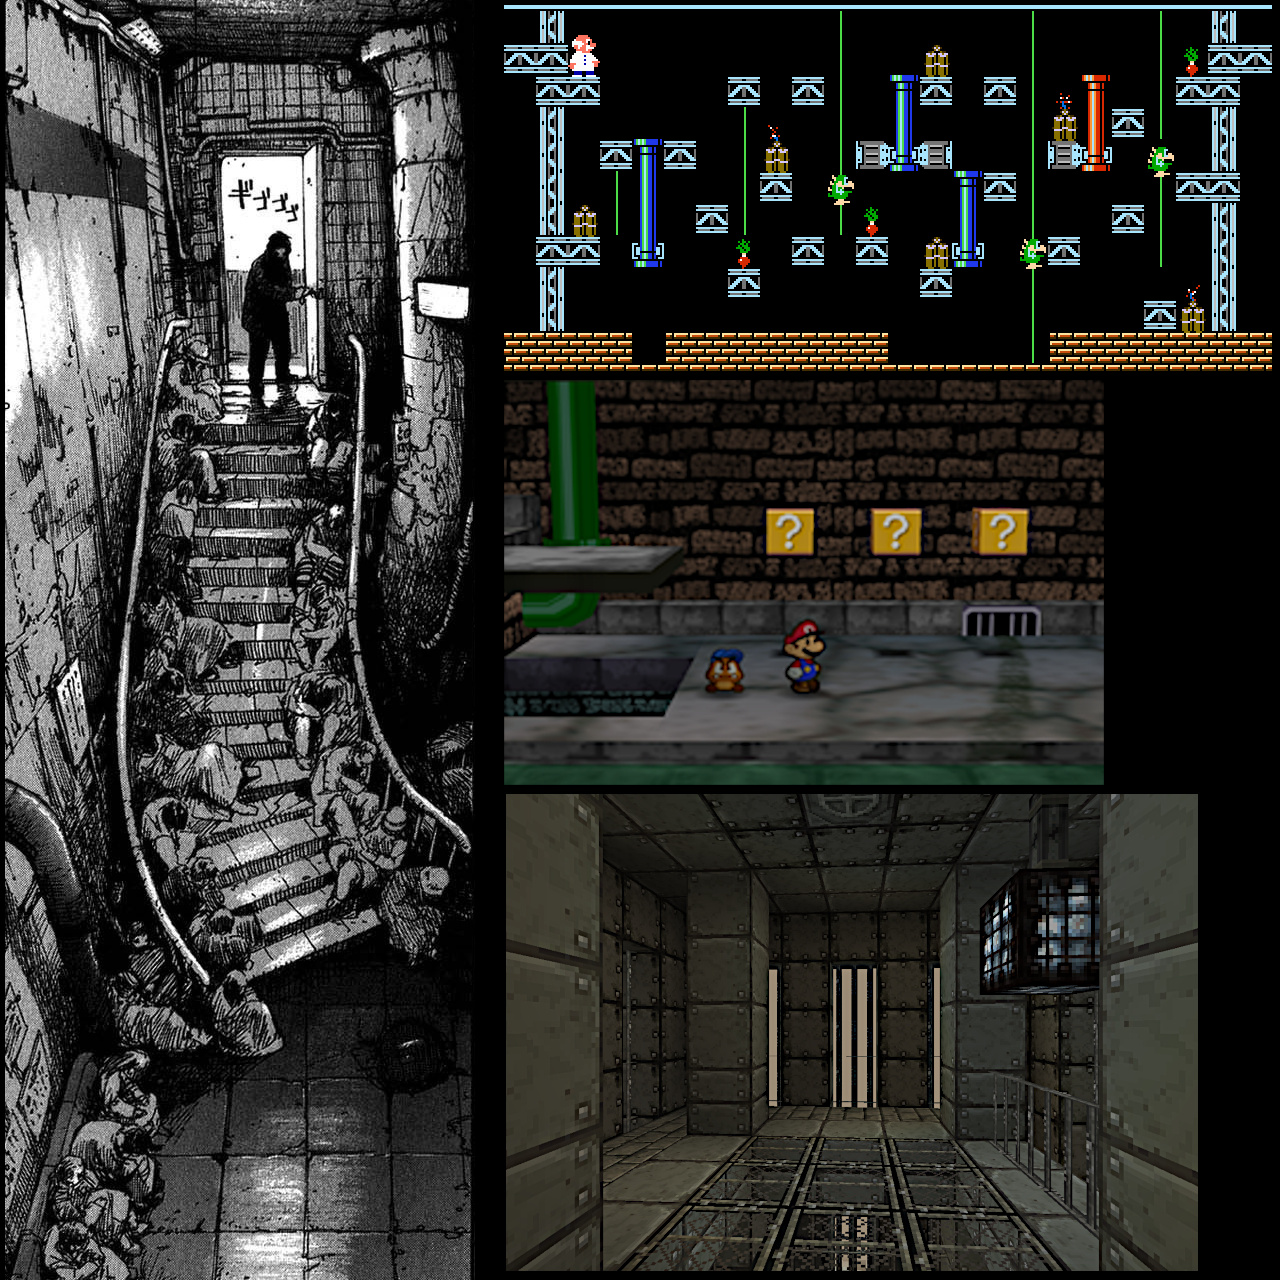
Main sources of inspiration for the art style: panel from Abara by Tsutomu Nihei (left), Gyromite (top), Paper Mario 64 (center), Minecraft with post-apocalyptic texture pack (bottom)
Getting Started is the Hardest Part
After the prompt ("You are not alone") came out Sunday morning, the team settled on making an industrial-themed horror/adventure game fairly quickly. However, picking a graphical style took a wrong turn at first. I suggested 2D graphics would be preferable to 3D graphics, thinking the gameplay would be easier to program.
However, I didn't anticipate the sheer difficulty of creating 2D graphics. The main problem was perspective. The game was supposed to be viewed from the side, but with a few tiles of depth to permit 2-dimensional character movement. I thought the interior environments in EarthBound would be a good style to take inspiration from, but found it very challenging to replicate because the perspective doesn't follow any real-world rules. What tripped me up the most is how the walls have a different perspective from the floor, and visual floor "tiles" don't correspond to actual character movement tiles. Furthermore, the "perfect diagonal" used looks clean but isn't well-suited to the 16:9 aspect ratio chosen for Unknown Corridor. Next, I tried doing a sort of top-down style with a very tall back wall, but it didn't look good. Meanwhile, Ding experimented with Unity's 2D lighting effects and had trouble getting them to look correct (i.e. how they would following 3D rules). So, he suggested moving the project to 3D. That was when things finally got going. The biggest downside was that it made implementing ladders extremely difficult.
GIMP
To cut down on complexity, a 16x16 pixel tile size and a 5-color palette were used. (The palette came from a 4-color one on Lospec.com, which I added pure white / hex #FFFFFF to for more contrast.) The smaller the palette and tiles, the faster development goes, because it puts an upper bound on the complexity. 16x16 is my preferred tile size because 8x8 is often too small to adequately represent what you want, while 32x32 requires a lot of detail to look good.
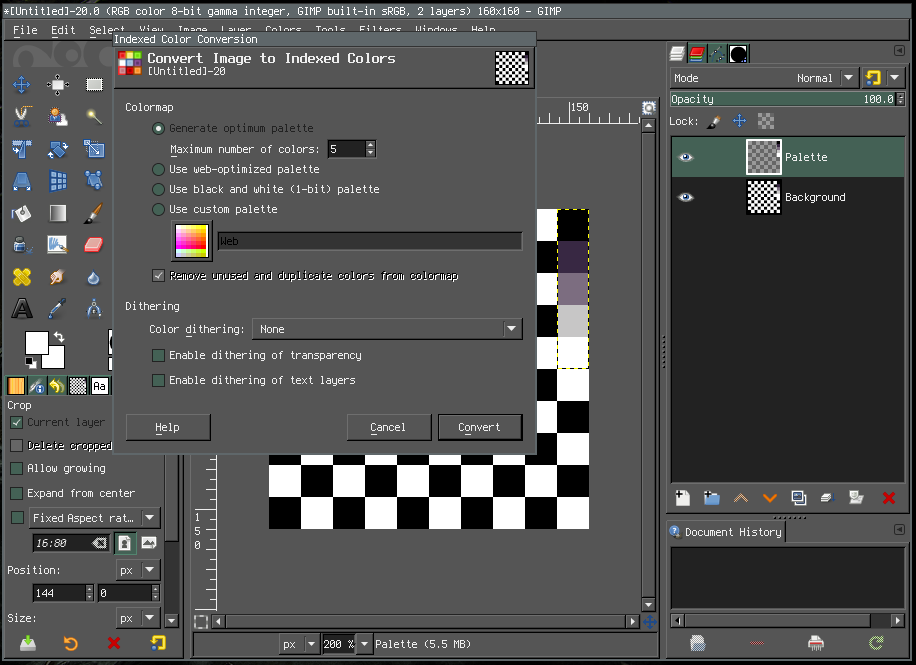
To start, in GIMP I created an 160x160 pixel image (providing space for 100 tiles) and generated a checkerboard pattern with 16x16 pixel sized squares as a visual reference for keeping my tiles lined up. Then, I added a series of squares containing the palette colors, and changed the image's color mode to indexed, as shown in the screenshot above. That way, things like the Brightness and Contrast tool would not produce pixels outside the chosen palette.
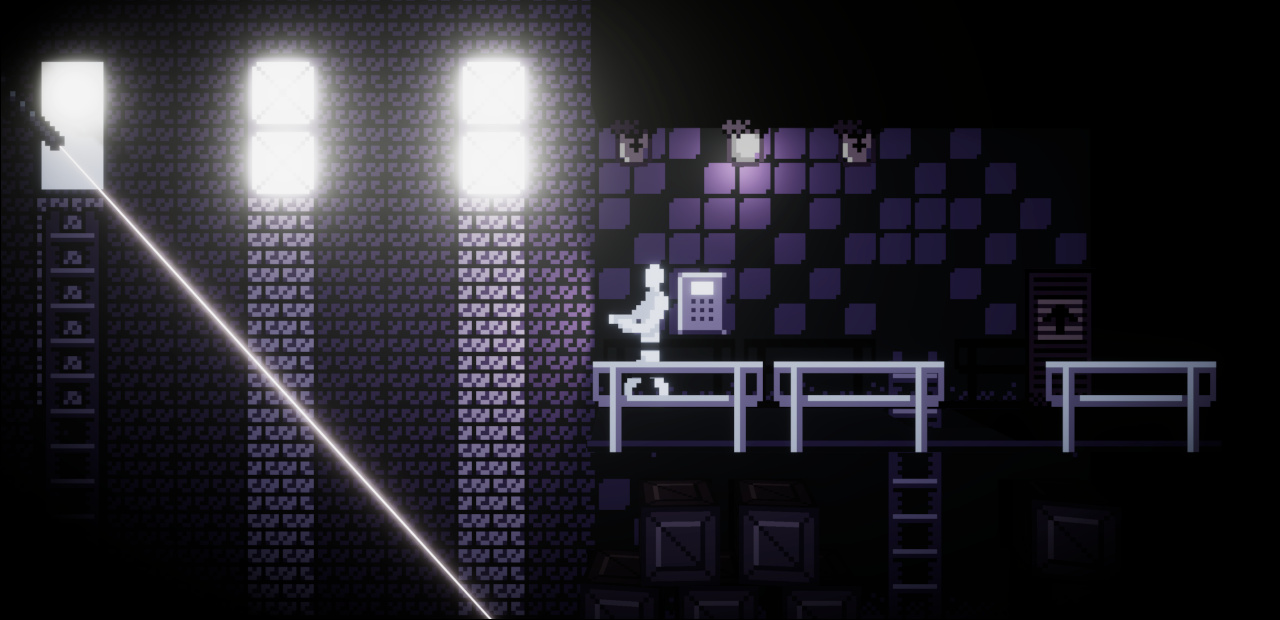
Then, I got to work drawing. I began with the most important tiles: a crate texture, a door, and some floor and wall tiles. That way, Ding and The Doc could start on the programming right away. For the floor tiles, brick tiles, and ladder I modified a few tiles from Chasersgaming's public domain NES tilesets on OpenGameArt.org as a starting point. It's all right to use existing resources as long as their license and the game jam rules permit it; Hobba used clips from Freesound.org to create the game's audio. In order to create a spooky atmosphere and provide visual contrast, I stuck to the darker colors in the palette, while Hobba made the player character sprites with the lightest colors. I used lighter colors to emphasize certain objects like the doors and PIN pads. In Unity's lighting system, lighter-colored parts of textured objects reflect more light, so they would almost appear to glow when highlighted by the player's flashlight.
It's worth noting that I used GIMP just because it's what I'm familiar with. Every artist seems to swear by something different, but you can really use whatever you want for pixel art.
Tiled
Tiled is a pretty cool pixel map editor. To start creating Unity textures, I exported the tileset from GIMP as a PNG, and then created a new tileset from it in Tiled.
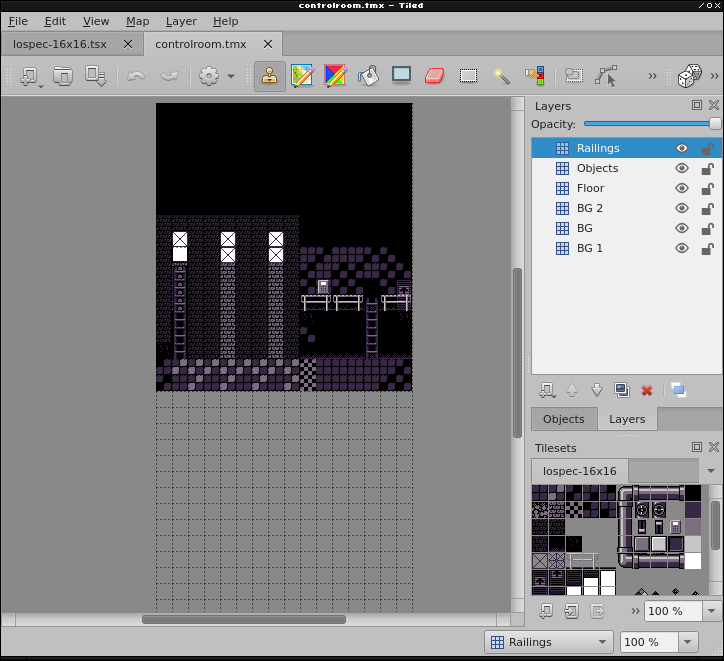
Unity textures have to be square in order to display how you want. For this game, each room was a rectangular prism and I only applied textures to the back wall and floor. So, for each level, I created a Tiled map file that was the same width as the level and twice that in height. The top half was the back wall and the bottom half was the floor. I exported them as separate images by cropping them. For scenes that had additional layered elements (such as the railings in the screenshot at the start of this page), I drew those elements on separate layers and exported them as separate images, because they were used for separate objects in Unity.
The Unity Editor
Unity is big. So big, in fact, that the install initially failed with a "not enough storage"
error message because it extracts itself into /tmp then moves itself to the install destination,
but my /tmp partition was too small.
I had to create a new directory on my /home partition, ~/tmp,
and change my TMPDIR environment variable to point there instead.
Then, the install worked.
Here, the back wall and floor are different 16x16x1-unit cubes, and the railings are an 8x8 quad.
I found the GUI editor a bit laggy and buggy, and constantly clicking around up and down the project directory tree got tiresome. A couple times, I accidentally dragged something and crashed Unity so hard that it took my mouse input with it and I had to restart X. When Unity crashes, it doesn't exit cleanly; instead, it hangs and messes up your display server. However, my biggest annoyance was that in the scene editor, the origin of an object is its center point, not one of the vertices of its bounding box. That made lining up walls and floors more of a pain, especially because it can be difficult to see what you're doing. Because the dimensions had to be pixel perfect, I avoided the editing tools and instead just adjusted the numbers in each object's "Transform" section.
So that the pixel art style would look correct, I made each object the same number of units in size as the texture that would be applied to it (for example, a 16x16 tile wall would be a cube with an x-scale of 16, a y-scale of 16, and a z-scale of 1). Something to beware of when creating 2D objects in Unity is the difference between a plane and a quad. A plane looks like a flat... plane but actually has a large number of polygons, and a default size of 10x10 units (which makes scaling annoying). Meanwhile, a quad also looks like a flat plane but only has 2 polygons and a default size of 1x1 units. That's the one you want for sprite graphics like this.
The sheer number of platforms Unity supports is very cool. However, the build process was one of the most difficult parts of development. If a game works when you press "play" in the editor, that does not necessarily mean the standalone build will work. Unknown Corridor was intended to be built for the HTML5 Unity platform so it could be played in-browser, but that build just had a black screen after the main menu. After hours of fiddling with settings, only the Linux and Windows desktop builds worked. The Doc's best guess is that one of the libraries used was somehow not compatible. In the future, I won't save testing the build process for the last minute.
One quirk of HTML5 Unity games is that you can't just open them in your browser; you have to be running a HTTP server with CGI enabled. Some issues can come from the server not setting the necessary headers for all the different files. If I'd known this going in, I would have used Nginx for testing, but since there were only a couple hours left when the game was submitted, I used Python 3's built-in HTTP server module from inside the build output directory, like so:
$ cd /tmp/unknown_corridor_webgl
$ python3 -m http.server --cgi
Conclusion
This whole experience was both rewarding and frustrating. I'm very grateful to Ding, Hobba, and The Doc for their patience with my lack of Unity knowledge and their hard work on this game. Next time, I'd like to try a different game engine such as Godot, or cut out the middleman and just use a library like SDL2 to see how it compares.